# Hexo 使用 github Action 发布
# 介绍
Github Actions 可以很方便实现 CI/CD 工作流,类似 Travis 的用法,来帮我们完成一些工作,比如实现自动化测试、打包、部署等操作。当我们运行 Jobs 时,它会创建一个容器 (runner),容器支持:Ubuntu、Windows 和 MacOS 等系统,在容器中我们可以安装软件,利用安装的软件帮我们处理一些数据,然后把处理好的数据推送到某个地方。
本文将介绍利用 Github Actions 实现自动部署 hexo 到 Github Pages 和阿里云 oss
没有 Github Actions 之前,我们需要写完文章执行 hexo d 来进行部署。有了 Github Actions 之后,workflow 会自动部署我们的笔记。
# 前提
# 创建所需仓库
- 创建一个 github 仓库用来存放 Hexo 项目,我这边是
Twelveeee/MyNotesBlog一个 private 的仓库 - 创建
your.github.io仓库用来存放静态博客 github page,我这边是Twelveeee/Twelveeee.github.io
# 配置 GithubToken
GithubToken 是为了在执行 githubAction 的时候有权限访问仓库
参考 https://blog.51cto.com/u_15069485/3590346
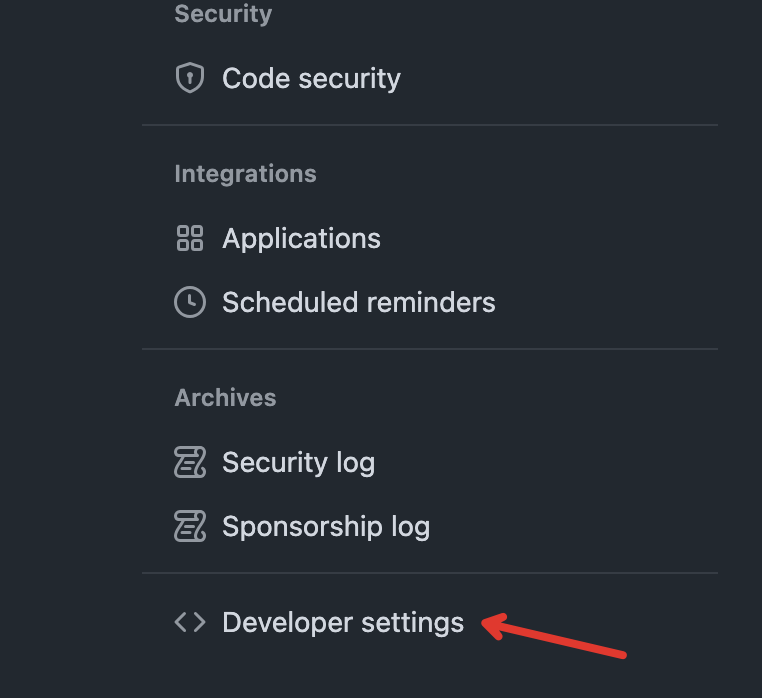
在 github setting 打开 Developer settings
打开 Personal access tokens
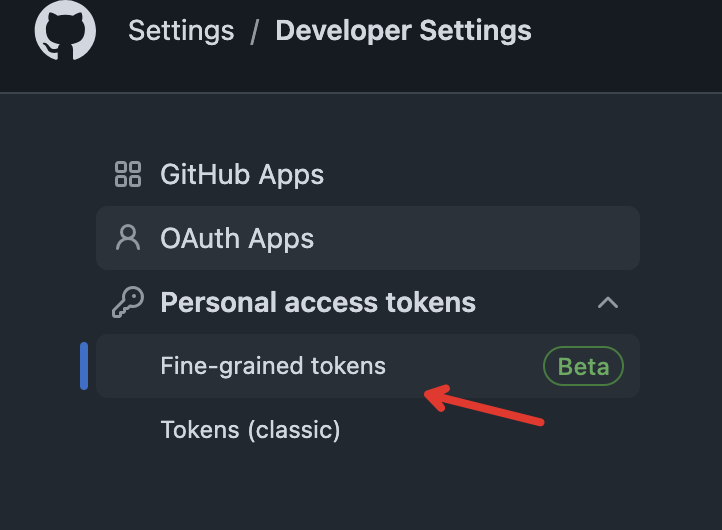
点击 Generate new token 按钮

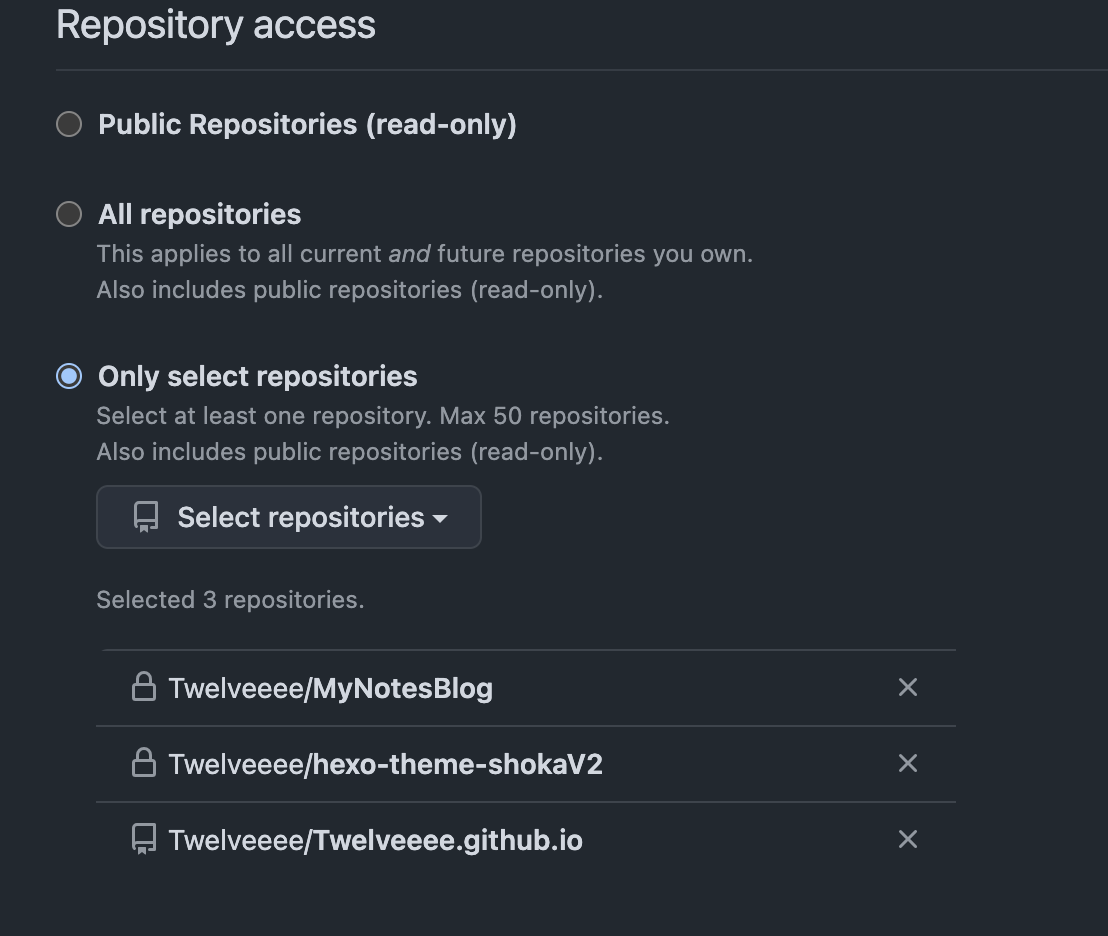
选择对应的仓库
Permissions 开
Read access to actions variables and secrets
Read and Write access to actions, code, commit statuses, deployments, environments, pages, pull requests, and workflows
获取到 token 记录下来
# 配置 GithubAction 参数
打开项目, Settinngs->Secrets and variables New repository secret
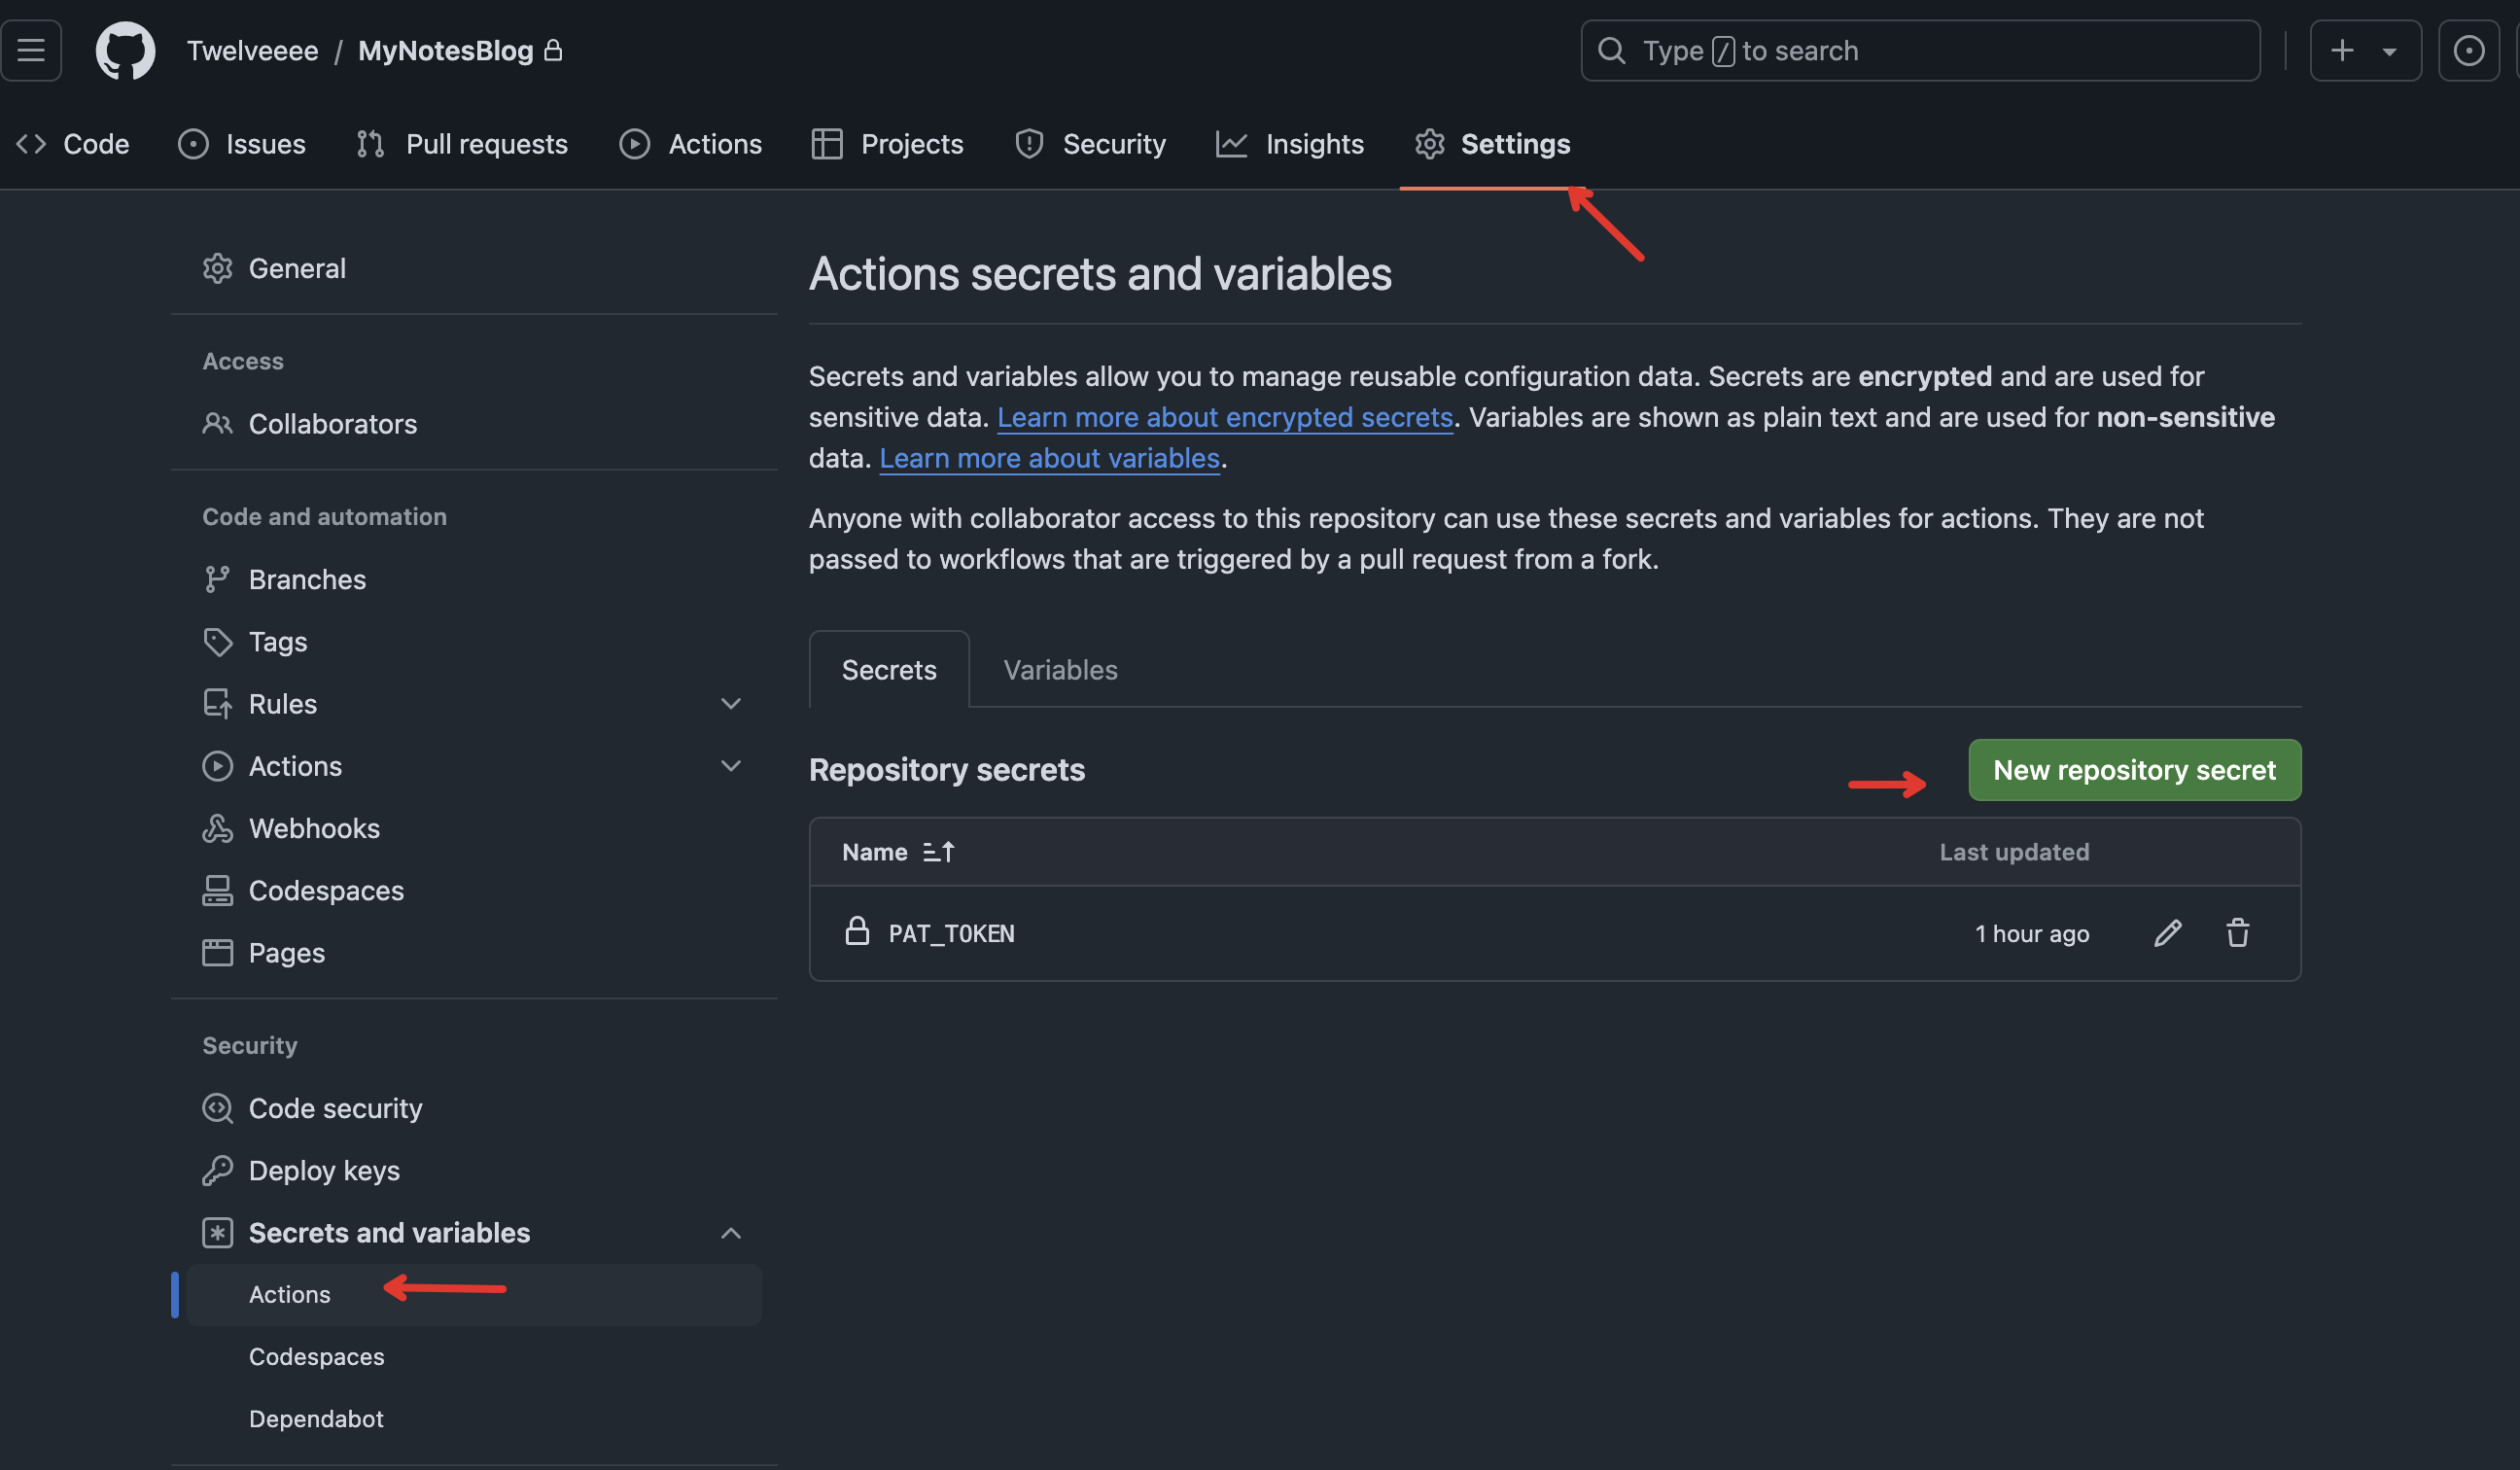
把上面提到的 token 写进去 变量名称需要与下面的 deploy.yml 一致
# 编写 Github Actions
# Workflow 模版
在 blog 仓库根目录下创建 .github/workflows/deploy.yml 文件,目录结构如下。
blog (repository)
└── .github
    └── workflows
        └── deploy.yml
在 deploy.yml 文件中粘贴以下内容。并且更改 env 为自己对应的值。
name: Pages | |
on: | |
push: | |
branches: | |
- main | |
env: | |
GIT_USER: Twelveeee | |
GIT_EMAIL: twelveeee12@gmail.com | |
THEME_REPO: Twelveeee/hexo-theme-shokaV2 | |
THEME_BRANCH: master | |
THEME_NAME: shoka | |
DEPLOY_REPO: Twelveeee/Twelveeee.github.io | |
DEPLOY_BRANCH: main | |
jobs: | |
build: | |
runs-on: ubuntu-latest | |
steps: | |
- uses: actions/checkout@v4 | |
with: | |
token: ${{secrets.PAT_TOKEN}} | |
submodules: recursive | |
- name: Configuration environment | |
run: | | |
sudo timedatectl set-timezone "Asia/Shanghai" | |
git config --global user.name $GIT_USER | |
git config --global user.email $GIT_EMAIL | |
- name: Checkout theme repo | |
uses: actions/checkout@v4 | |
with: | |
repository: ${{ env.THEME_REPO }} | |
ref: ${{ env.THEME_BRANCH }} | |
path: themes/${{ env.THEME_NAME }} | |
token: ${{ secrets.PAT_TOKEN }} | |
- name: Checkout deploy repo | |
uses: actions/checkout@v4 | |
with: | |
repository: ${{ env.DEPLOY_REPO }} | |
ref: ${{ env.DEPLOY_BRANCH }} | |
path: .deploy_git | |
token: ${{ secrets.PAT_TOKEN }} | |
- name: Use Node.js 20 | |
uses: actions/setup-node@v4 | |
with: | |
node-version: "20" | |
- name: Cache NPM dependencies | |
uses: actions/cache@v4 | |
with: | |
path: node_modules | |
key: ${{ runner.OS }}-npm-cache | |
restore-keys: | | |
${{ runner.OS }}-npm-cache | |
- name: Install Dependencies | |
run: npm install | |
- name: Deploy hexo | |
env: | |
GITHUB_TOKEN: ${{ secrets.PAT_TOKEN }} | |
run: | | |
npm run deploy |
# 模版说明
# Workflow Overview
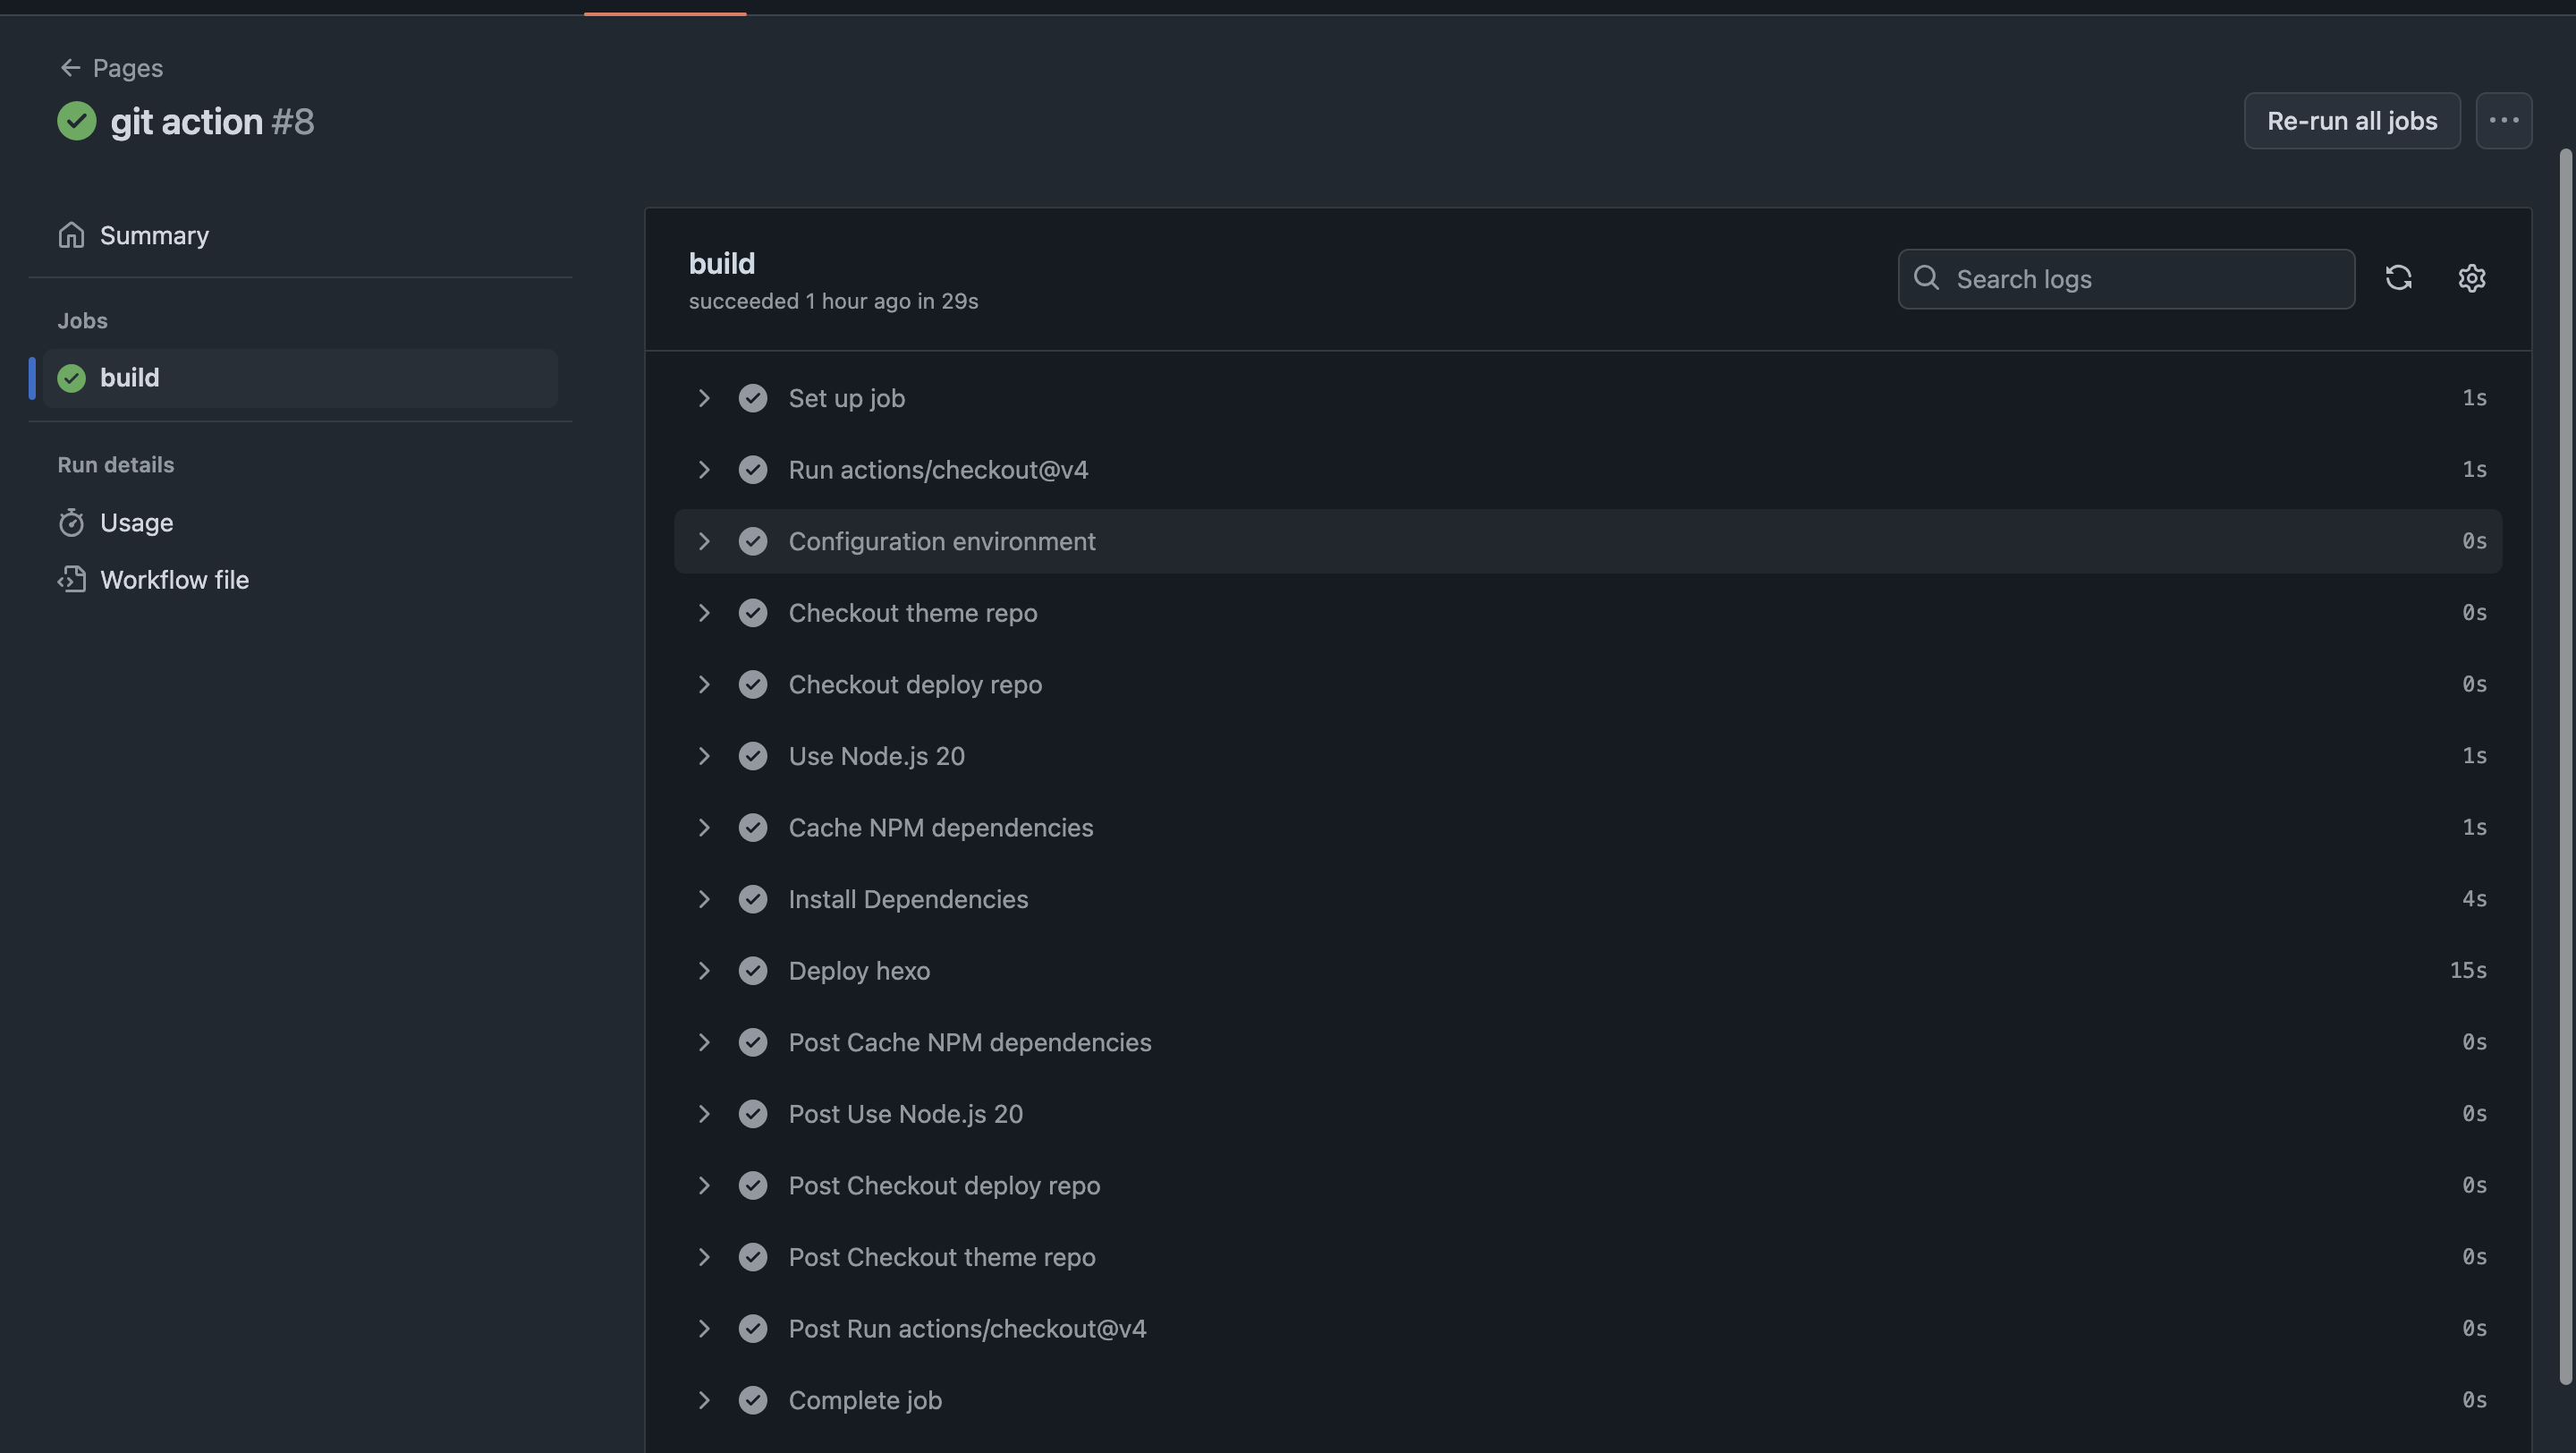
这个工作流名为 Pages ,在 main 分支有新的推送时会被触发。都会自动更新博客的内容。
# Environment Variables
- GIT_USER: Git 用户名,用于配置 Git 提交。
- GIT_EMAIL: Git 邮箱地址,用于配置 Git 提交。
- THEME_REPO: Hexo 主题的仓库地址。
- THEME_BRANCH: Hexo 主题的分支。
- THEME_NAME: Hexo 主题的名称。
- DEPLOY_REPO: 部署的 GitHub Pages 仓库。
- DEPLOY_BRANCH: 部署的分支。
# Job: build
这个工作流定义了一个名为 build 的作业,运行在最新的 Ubuntu 环境上。
# Steps
- Checkout Main Repository:
- 使用
actions/checkout@v4来签出触发工作流的主仓库代码。 - 使用
${{ secrets.PAT_TOKEN }}作为身份验证令牌。 - 递归地签出子模块。
- 使用
- Configuration Environment:
- 设置时区为 "Asia/Shanghai"。
- 配置 Git 用户名和邮箱,以便后续的提交操作。
- Checkout Theme Repository:
- 使用
actions/checkout@v4签出主题仓库。 - 指定分支和路径为
themes/${{ env.THEME_NAME }}。 - 使用
${{ secrets.PAT_TOKEN }}进行身份验证。
- 使用
- Checkout Deploy Repository:
- 使用
actions/checkout@v4签出用于部署的仓库。 - 指定分支和路径为
.deploy_git。 - 使用
${{ secrets.PAT_TOKEN }}进行身份验证。
- 使用
- Use Node.js 20:
- 使用
actions/setup-node@v4来设置 Node.js 环境,版本为 20。
- 使用
- Cache NPM Dependencies:
- 使用
actions/cache@v4缓存node_modules目录,以加速后续的构建。 - 使用
${{ runner.OS }}-npm-cache作为缓存键。
- 使用
- Install Dependencies:
- 运行
npm install安装项目所需的依赖。
- 运行
- Deploy Hexo:
- 设置
GITHUB_TOKEN环境变量,用于身份验证。 - 运行
npm run deploy,执行 Hexo 部署脚本,将生成的静态文件推送到 GitHub Pages 仓库。
- 设置
# 部署注意事项
因为使用到了 npm run deploy 所以 package.json 里面要有 deploy
"scripts": { | |
"build": "hexo generate", | |
"clean": "hexo clean", | |
"deploy": "hexo deploy", | |
"server": "hexo server" | |
}, |
使用 hexo deploy
所以需要确保安装了 hexo deploy 服务
# 发布到 oss | |
npm i hexo-deployer-ali-oss-extend | |
# 发布到 github page | |
npm install hexo-deployer-git --save |
并且配置了相应的配置
_config.yml 里
deploy: | |
- type: ali-oss | |
region: oss-cn-beijing | |
accessKeyId: *** | |
accessKeySecret: *** | |
bucket: *** | |
cacheControl: | |
images: | |
css: | |
js: | |
html: | |
other: | |
- type: git | |
repo: https://github.com/Twelveeee/Twelveeee.github.io | |
branch: main |
当然,如果没有对应的 type 可以将相应的配置注释掉。
# 执行任务
任务完成之后查看 对应的 github page
https://twelveeee.github.io/
确实有相应的文章
# 参考资料
https://hexo.io/docs/github-pages#One-command-deployment
https://sanonz.github.io/2020/deploy-a-hexo-blog-from-github-actions/
https://github.com/actions/checkout